- Finisher's Edge
- Wood Staining & Finishing
- Wood Touch Up & Repair
- Wood Care & Maintenance
- Leather Touch Up & Repair
- Leather Care & Maintenance
- Upholstery Care & Maintenance
- Tools & Accessories
- Promotional Items
- Enduragreen
- Build An Express Kit
Build An Express Kit
Build your own professional custom tool kit by selecting a product variation and quantity listed below featuring an assortment of our wood, vinyl, leather and furniture touch up products.
Build Now

Fall Wreath Blog
10/2/2020
Welcome back to another blog from Matt and Beth. Today we are going to show you how to step up your Fall décor with a DIY wreath for the front door. Let’s face it, Fall decorations are just as much about the outside look as they are the inside, and the ready to hang wreaths from the retail stores are not cheap. That’s why Beth and I decided to make our own with a little help from Mohawk. If you’ve read our other blogs, you know we are not experts, not even close, so our techniques and applications are not perfect, but that’s the fun in it. We want to show that you don’t have to be a skilled craftsman to use Mohawk products.
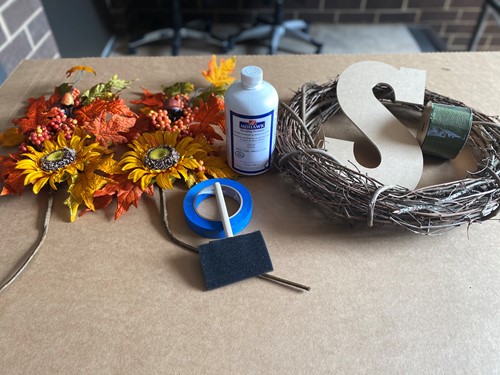
What We Used:
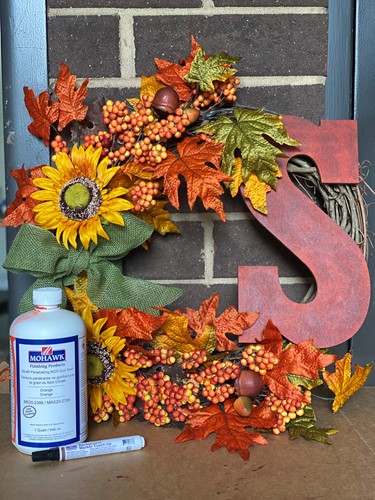
- Mohawk’s Ultra® Penetrating NGR Dye Stain – Orange – M520-2386
- Mohawk’s Background Marker Touch Up – Weathered Tavern – M294-0310
- Wooden letter
- Grape vine wreath
- Ribbon
- (2) decorative floral arrangement
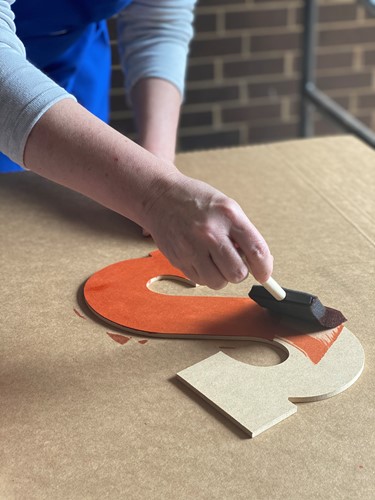
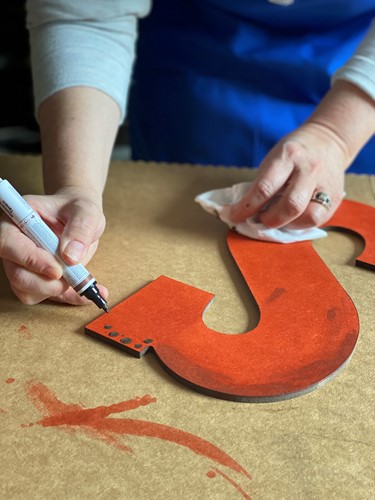
Step 1: To get things started, we used our Mohawk Ultra® Penetrating NGR Dye Stain in orange to stain our wooden letter. We used a sponge brush for the application. You can also wipe or spray the stain directly on to the wood. Ultra® Penetrating NGR Dye Stain can be intermixed to create additional colors, but I’ll save that for another step.
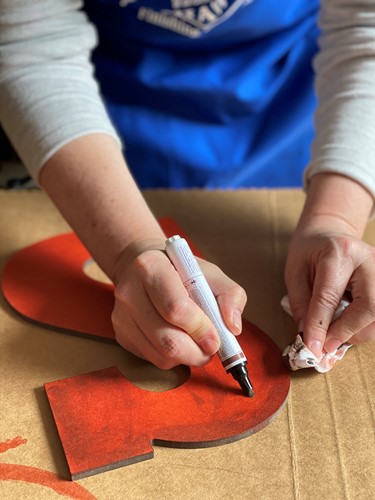
Step 2: We used Mohawk’s Background Touch Up Marker in Weathered Tavern to color the outside trim of the wooden letter to create some depth.
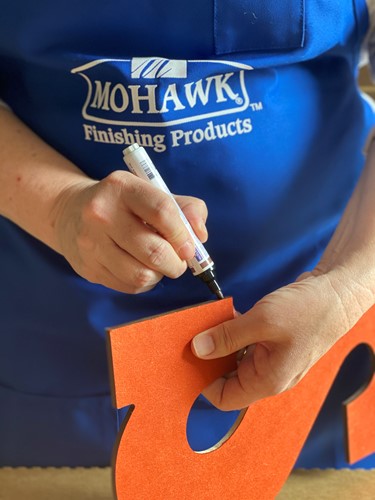
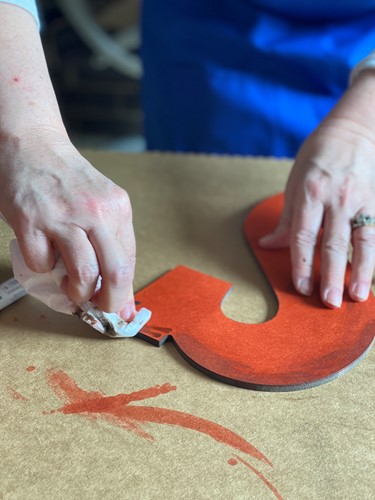
Step 3: We wanted to give our letter a rustic look so before the Ultra® Penetrating NGR Dye Stain had completely dried we colored and smeared Mohawk’s Background Touch Up Marker over the stain. Mohawk’s Background Markers dispense a thin, highly opaque, fast dying, low sheen film to replace background color over fills, glue lines, dark areas in raw wood, and other stains. Please note, what we did is not what the markers were created to do, but it does show the multitude of things you can do with a little creativity.
Step 4: Now, it’s time to assemble our wreath. We started placing our decorative floral arrangement on one side of our wreath.

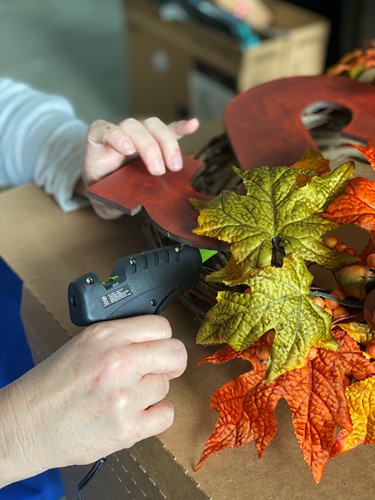
Followed by making a bow from ribbon that would work as a divider between the two floral decorations. Using a hot glue gun, we glued them in place.
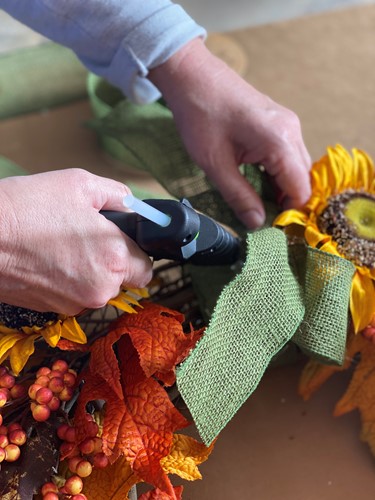
After the glue dried and the ribbon was cut and shaped, the wooden letter was added with hot glue.
Step 5: After the glue dries you can add a hook or hanger to make it easy to hang from your front door! Enjoy your new Fall wreath!
Thank you all again for joining us, and we hoped you enjoyed it! We hope you have a wonderful Fall, and we will see you soon with another project!
Matt & Beth