- Supply Shop
- Coatings
- EnduraGreen®
- Sealers & Primers
- Solvents
- Stains
- Adhesives
- Aerosols
- Burn-Ins
- Cleaners
- Color Replacement
- Fillers
- Leather
- Liquid Touch-Up
- Lubricants
- Markers
- Mohawk Kits
- Padding Finishes
- Pencils
- Polishes
- Rubbing Agents
- Scratch Removers
- Specialty Coatings
- Surface Prep
- Swellers
- Upholstery Cleaners
- Waxes
- Wood Floor Systems

Halloween Blog
10/19/2020
Introduction:
It’s that time of year again to turn your house into everything pumpkin spice and add fun Halloween décor to welcome your trick-or-treaters! This easy DIY craft is super cute and incredibly easy to make. It is completely customizable just by changing the colors or switching out the ribbon to match your other fall décor. We used easy to find items and made a star stencil of our own, so no hunting down stencils at the store that you can never seem to find. What matters far more is to use your time creating, maybe with the kids, and have fun! Let’s get started!

What We Used:
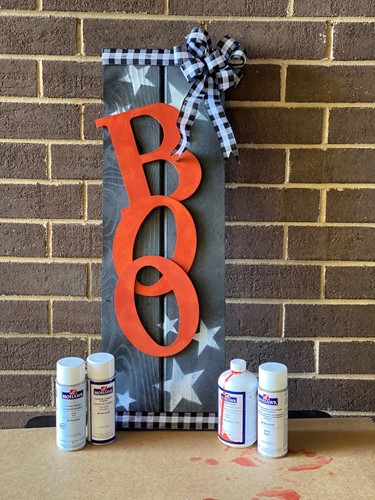
- Mohawk Primer Sealer – Black – M104-0224
- Mohawk Colored Lacquer Enamel – Extra White – M104-0338
- Mohawk Ultra Penetrating NGR Dye Stain – Orange – M520-2386
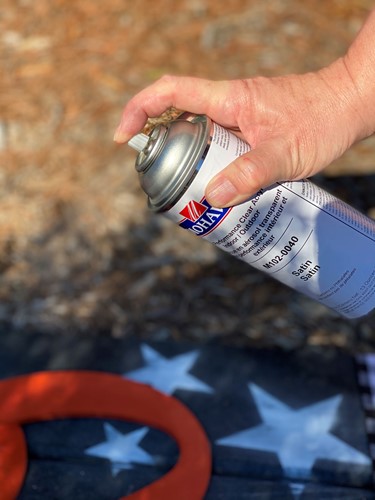
- Mohawk High Performance Clear Acrylic Indoor/Outdoor – M102-0040
- Wooden Letters
- Star Stencil
- Ribbon
- Wooden Board
- Painters tape
- Crafting knife
- Glue gun
- Stapler
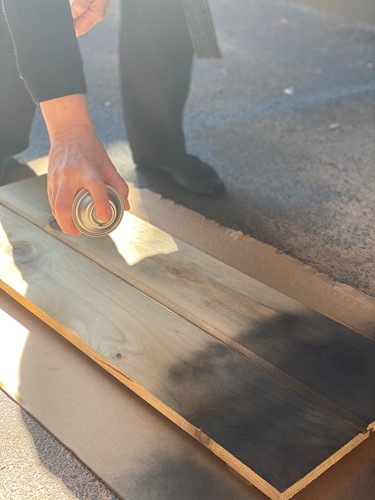
Step 1: We started by spraying the wooden board with the Mohawk Primer Sealer in black. Be sure to spay outside in a well-ventilated area and cover your work surface to catch the overspray.
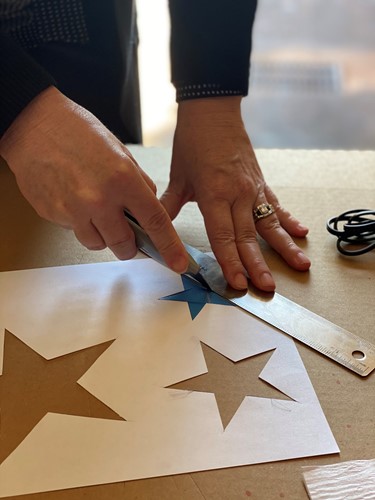
Step 2: While the black paint is drying, cut out your star stencil. We simply printed out stars in various sizes and used a craft knife to cut out the shapes. A ruler makes this super quick but be careful where you cut as the blade will leave marks on the surface below. We used a piece of cardboard beneath, but a cutting board would work as well.
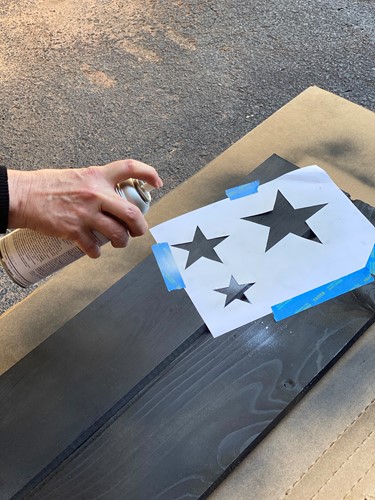
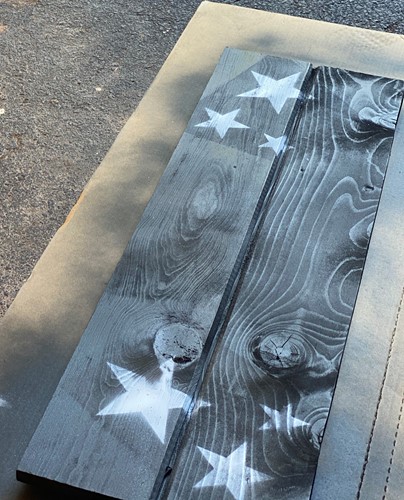
Step 3: By now, your wooden board should be dry. Lay your star stencil on your board and tape to keep it in place. Use the White Colored Lacquer Enamel to spray over the stencil. Add as many stars as you like, that’s the fun of DIY! Remember, spray outside!
Step 4: Paint the wooden letters and let dry.

Step 5: While your letters are drying, use your hot glue gun to glue down your ribbon. We laid a strip of the ribbon at the top and bottom and simply ran a line of glue underneath to hold in place. Be careful, the glue is very hot, so this part is best left for the adults.
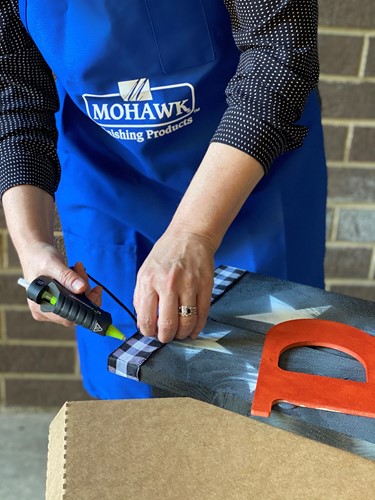
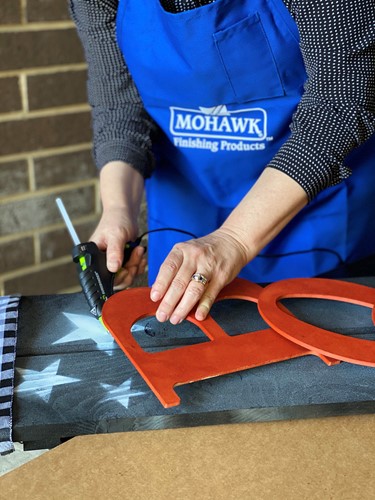
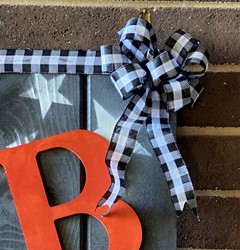
Step 6: Once your letters are dry, glue them down to the board. Play around with the letters to see which layout looks best to you, lined up straight or staggered.
Step 7: Protect your board with the High Performance Clear Acrylic aerosol. Lightly spray the board and let dry. This will keep your craft looking like new.
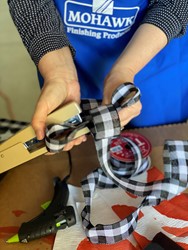
Step 8: Create the bow. To create the bow, make two opposing loops with the ribbon and staple in the center to hold it in place. Repeat with two loops at a time in opposite directions and staple. Don’t worry, all the staples will be hidden by the time you finish. Keep making the two loops and stapling in the center until your bow is as full as you want. The stapler makes it quick and easy. To finish your bow, cut a small piece of ribbon (about 5” long) for the center, make one final loop and staple it in the center of the bow. Make two long ribbon tales and staple those to the back of the bow. Fluff your bow. We used wired ribbon to make shaping the bow easier. Hot glue your bow on the top corner of the board.
We hope you enjoy this easy super cute DIY project! Have fun with it and Happy Halloween!
Beth & Matt