- Finisher's Edge
- Wood Staining & Finishing
- Wood Touch Up & Repair
- Wood Care & Maintenance
- Leather Touch Up & Repair
- Leather Care & Maintenance
- Upholstery Care & Maintenance
- Tools & Accessories
- Promotional Items
- Enduragreen
- Build An Express Kit
Build An Express Kit
Build your own professional custom tool kit by selecting a product variation and quantity listed below featuring an assortment of our wood, vinyl, leather and furniture touch up products.
Build Now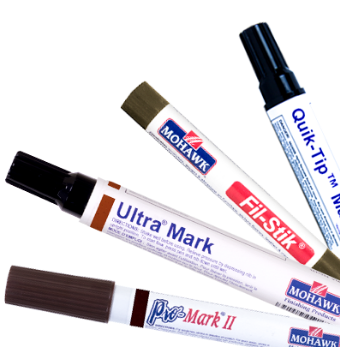
Labor Day Blog
9/9/2020
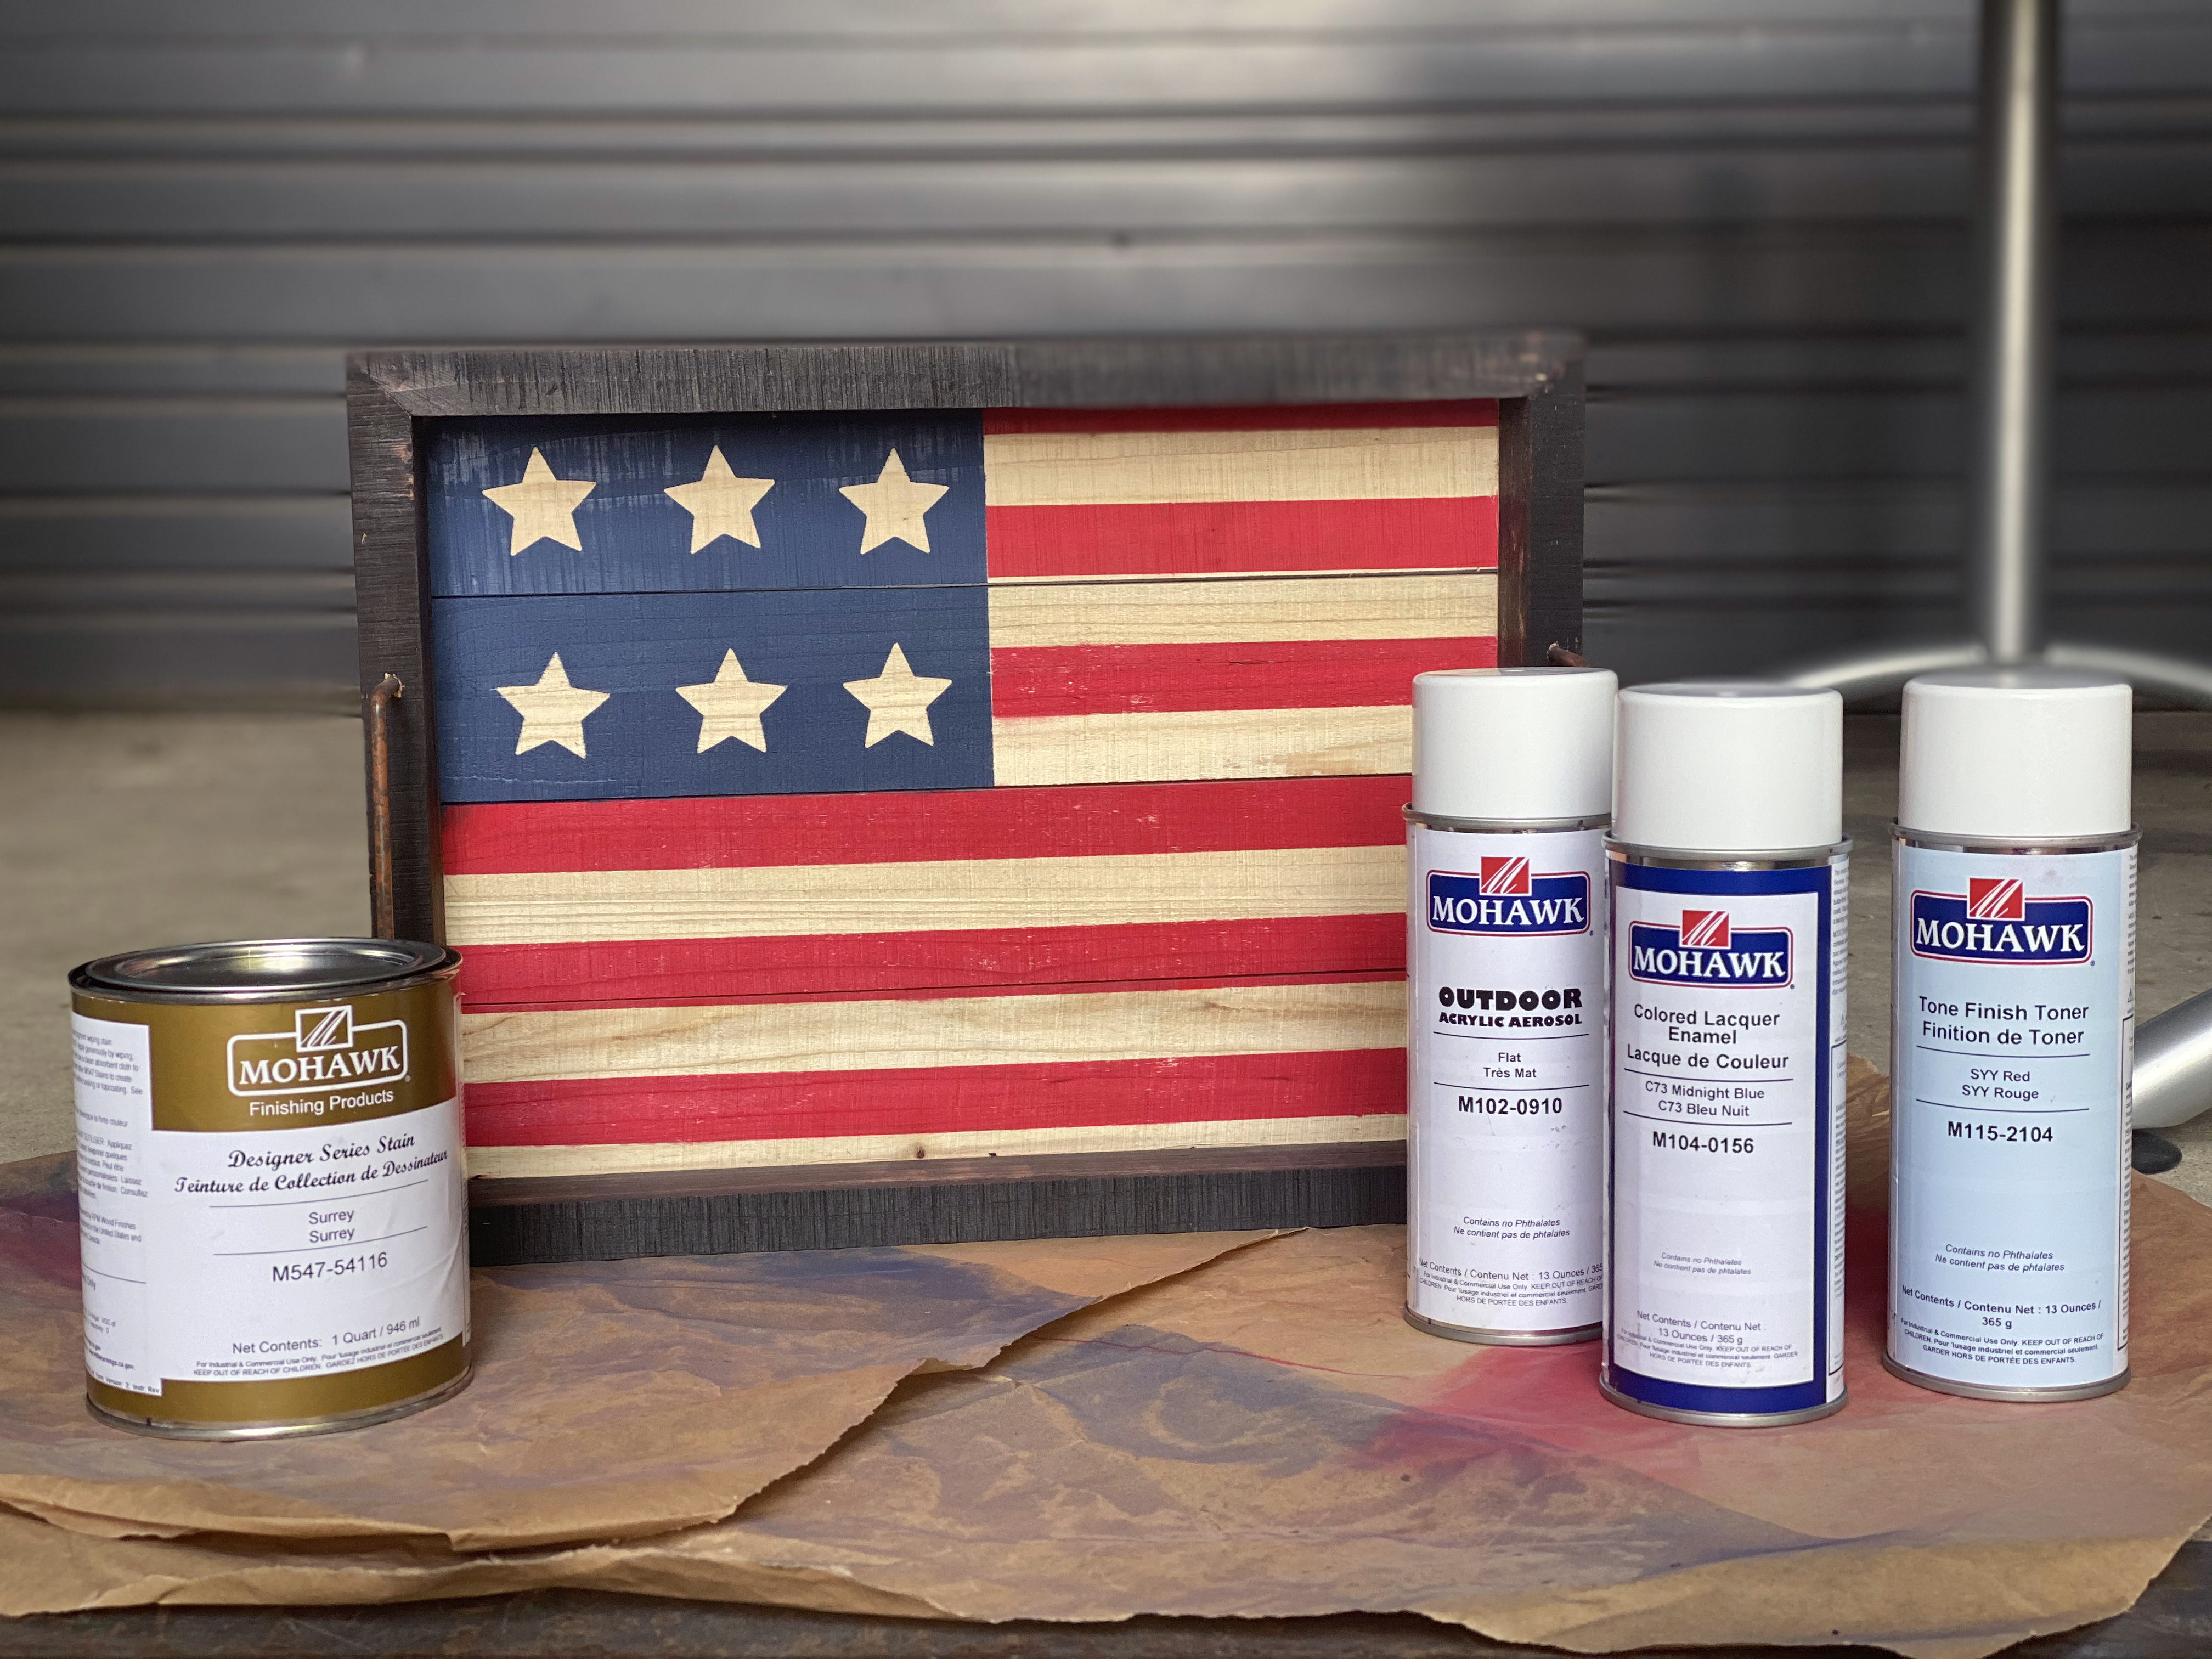
Introduction: Hello! This is the first blog post from Mohawk’s own Matt and Beth. A little background, Beth and I (Matt) work in Mohawk’s marketing department and when approached about getting content for new blogs we talked about it, weighed our options until we came to, what we think, was a pretty good solution, why don’t we do it ourselves! Now, I’ll preface this and almost every other blog we create with this… WE ARE NOT EXPERTS, not even close, I don’t know what’s below novice, but we are somewhere around that level. So why make a blog? Because we want to show that although Mohawk makes top-of-the-line products for experts and master craftsmen, you don’t necessarily have to be one to use or enjoy Mohawk products. With all that said, welcome again to our first blog, in the Labor Day holiday tradition we wanted to do something, American, something that said a day by the grill and pool before they closed for the season. We decided to refinish a wooden serving tray.
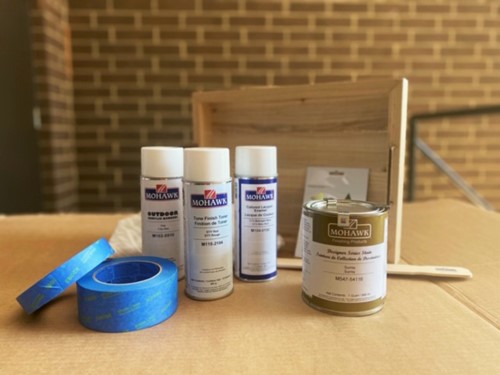
What We Used:
Wooden Serving tray
DESIGNER SERIES STAIN - SURREY QT - M547-54116
TONE FINISH TONER - SYY RED - M115-2104
COLORED LACQUER ENAMEL - C73 MIDNIGHT BLUE - M104-0156
OUTDOOR ACRYLIC AEROSOL FLAT - M102-0910
Painters tape
White Rags
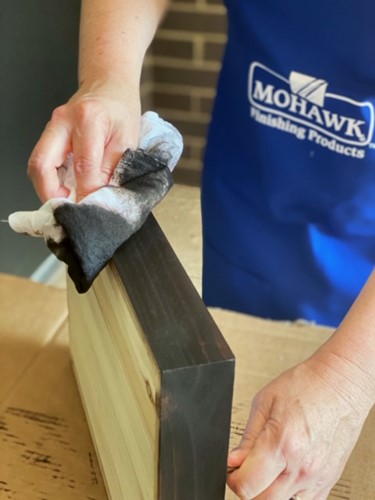
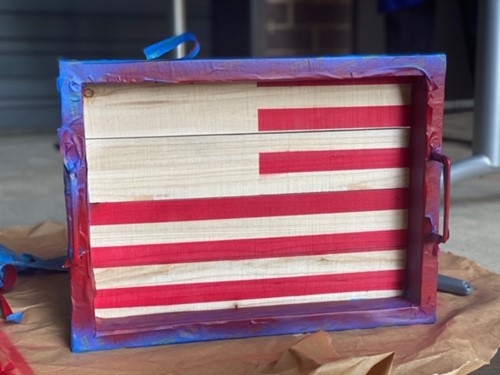
Step 1: Make sure the tray is cleaned and void of all stickers before starting. We weren’t sure if it would be a better idea to stain the inside first, or the outside, so we decided to go with the outside, so we had to tape off the inside.
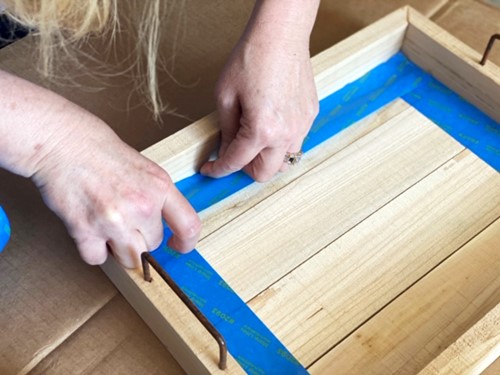
Step 2: After taping off the inside we opened the Mohawk Designer Series Stain
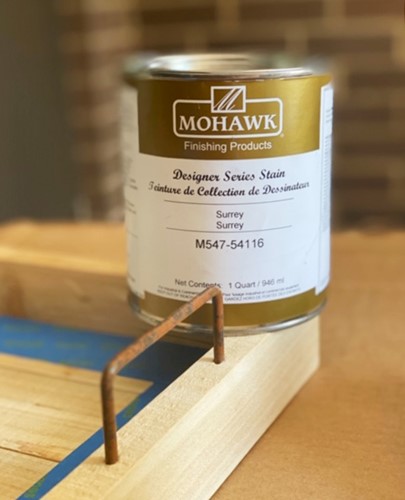
We applied the stain with a rag, using a clean piece of the same rag to wipe up any excess stain from the wood.
Step 3: After you let the stain completely dry (lessons were learned), you can move on to the inside. We completely taped off the outside and began prepping the inside taping off the area for the stars and laying out the stripes for the flag.
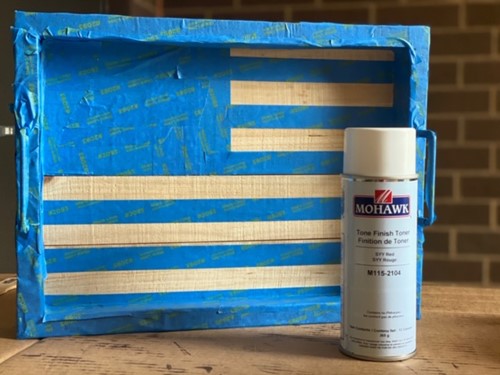
After the tape was ready and we double-checked to make sure that it was laid flat and tight we sprayed the first coat of our Tone Finish Toner in SYY Red. We went back and added a light 2nd coat to make sure it was even all the way through.
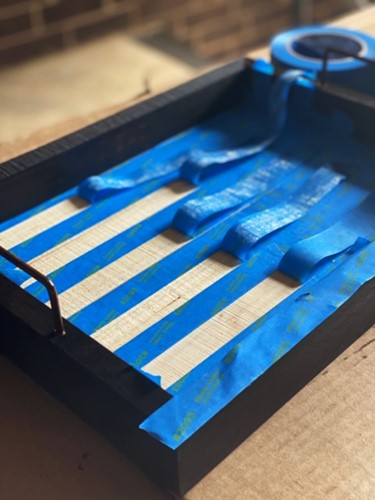
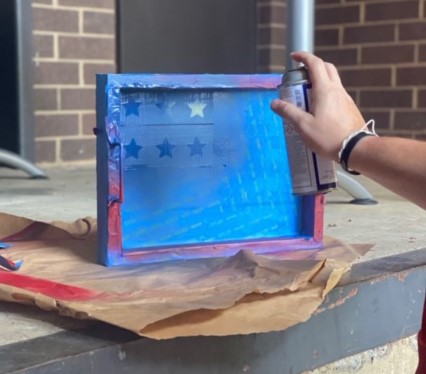
Step 4: MORE TAPING! After letting the red dry, it was time to switch the tape around so we could make the canton (the part with the stars) on the flag.

We found some star stickers from at the craft store that we laid down to make the shape of the stars, seemed easier. Now, just shake and spray our C73 Midnight Blue Colored Lacquer Enamel. Even though we work for Mohawk, I will unashamedly tell everyone how great this product sprays on, one coat and we were done. It was amazingly easy.
Step 5: After the Colored Lacquer Enamel has dried, remove the tape from the wood surfaces. This is also the time to touch anything up because this step is applying our Outdoor Acrylic Aerosol.
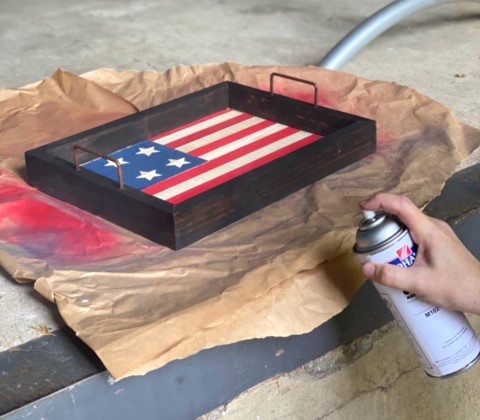
Step 6: Remove the final pieces of tape from the tray handles after the Acrylic Aerosol has dried…. And enjoy!

Thank you everyone for reading and we hope you enjoyed it. As stated at the beginning we’re not experts, not even close. We just wanted to show everyone that you don’t have to be a seasoned craftsman to do a project with Mohawk products. We hope you had a wonderful Labor Day and we’ll see you soon with another project!
Matt & Beth